Day 275 – Peroxide Mixture to Whiten Whites

White clothes. They can be really pretty. Or they can be that color that resembles the kid in your class who pulled his clothes out from under the pile of dirty laundry.

It seems like now, more than ever before, I have a few white shirts that I really like. Unfortunately, the more you wear white things, the more you wash them. Then the more you look like that kid…

I have one white shirt that I really love. The people I work with are probably getting tired of seeing me wear it. I wanted to try this whitening technique out on that shirt, but I was afraid something would go terribly wrong and it would be ruined. So instead, I tried it out on a basic white t-shirt that I have stopped wearing for the most part because of its dinginess.

I mixed equal parts of Dawn dish soap and hydrogen peroxide. Then I sprinkled in a bit of baking soda for extra scrubbing capacity. That’s what the original pinner did. I did not measure, and I am thinking that this would have worked the same whether or not there was baking soda in it or not.

Then I used a scrub brush that was dipped in the solution and scrubbed at the shirt. It was really hard to scrub the shirt because it kept sliding all around and the solution kept soaking into the fabric. Finally, I just dumped some onto the shirt while I was standing over the sink and I just rubbed it all in like I was hand washing it. Then I rinsed it all out and threw it in the washing machine.

Surprisingly, this was very successful! As I was scrubbing with that brush, I was thinking about telling you that it was totally not worth it and you should just buy yourself a new white shirt. Now that I am done, I would say you should give this a try if you need to whiten your whites.

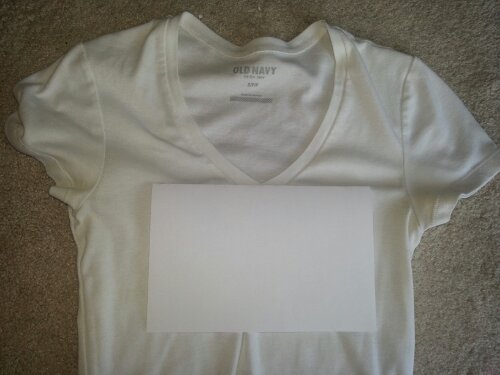
These pictures don’t do it justice. The paper is there to give you reference to its whiteness…

Before:
image

After:
image

Total cost: $0

Day 274 – Cleaning Windshield Haze

Tonight, on my way home from work, I drove directly into the sun. It really felt like I was headed right for it. I couldn’t see a thing…except for that annoying windshield haze that is so hard to get rid of.

I have to admit that I don’t really wash the windows in my car. My mom yells at me about it every time that she drives my car. It’s just that I hate streaky windows and every time I try to clean them, that’s what I end up with. But since I have avoided cleaning it for a really really long time, it was pretty bad. I was starting to notice it even when the sun was not directly shining right on it.

So tonight, I decided it was time for action. Surely there would be some Pinterest project to clear it away. After a quick search, I found this sentence on a website:

Remove haze from glassware. (Just soak, rinse, and air dry.) It’s also great for removing the haze that accumulates on the inside of my car’s windshield, which I’ve heard actually comes from (ick) the fumes emitted by dashboard vinyl.

If you notice, there is not much of a description for what to do. I wasn’t really sure, so I just made it up. I poured about half water and half vinegar into a spray bottle. Then I sprayed a paper towel and scrubbed the window. Immediately, I could tell that the haze was lifting. It seemed quite successful, so I kept going on all of the windows, inside and out. It did not do a great job scrubbing off dead bug splatter, but otherwise, it was quite successful. It even got the niece and nephew fingerprints off of the rear windshield that I have been meaning to get for a little while now too.

The real test will be driving into the sun. I usually do that on my way to work in the mornings, so I am hoping tomorrow I am as happy with the vinegar spray as I am right now.

Total cost: $0

Day 273 – Baby Shower Card

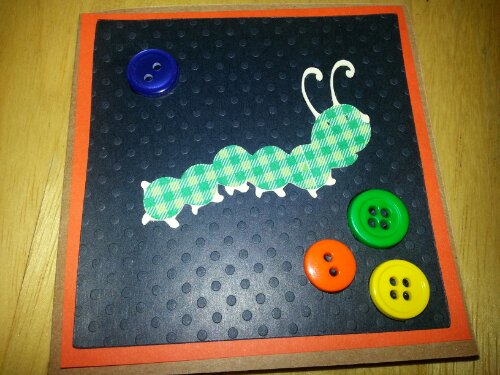
This morning I realized that I needed a card for a baby shower that I was attending later in the day. I usually forget about cards and just use a scrap of wrapping paper or the tag that comes on most bags. Today, I decided to do things correctly, and pulled out my Cricut machine.

I used this pin as my guide, and ended up with this:
image


Total cost: $0 (almost everything I used was from my scrap paper pile)

Day 272 – Reaching a Running Goal

Image

It is true. Running is mostly a mental game. You can trick your mind into thinking you either can or can not do anything.

I have been running on and off for the past 10 or so years and I have come to learn that mentally, if I pass my house with the intentions of continuing to run, I have the most difficult time. It’s like I see my house and my body just quits on me. I am more of an out and back kind of runner. I like to run to the halfway point of my distance and turn around, knowing that I have less than half of the way to go with every step I take on the way back. Mental games!

My most recent mental game was that I decided I wanted to run a 5k in less than 30 minutes. My regular runs took me to somewhere around 31 or 32 minutes, but I never could break it.

Well, today I did, officially. I had done it a few times in practice over the past few weeks, but today, it was in print. I did it in 29 minutes and 22 seconds. It’s not way under 30 minutes, but it is under! And it is the fastest that I had done it in any of my practices. I can live with that!

Total cost: $0 for breaking the goal, but $40 for the race…this is a pricey hobby!

Day 271 – Motivational Quote

image

I just love motivational quotes and after the day I had today, I needed some motivation. Without getting into too much detail on the internet, my day mostly sucked…all the way down to the very last minute I was in the building and the restroom stall that I was using didn’t have any toilet paper! 
It is really easy to harp on the craptastic things in life. Tonight, my awesome husband listened to me spill everything about my day, and gave me the appropriate amount of empathetic outrage. Then he reminded me that it is all about how I look at things and I shouldn’t let it ruin my weekend. It is over, and rehashing things in my mind won’t help it get better.
I bet he and Martha Washington would have been good buddies.

Total cost: $0

Day 270 – Dryer Sheet to Remove Deodorant Marks

After years of wearing deodorant, I have learned the lesson of putting it on AFTER I put on my shirt. Otherwise, almost inevitably, I will get marks on my shirt. It’s like I don’t know how to put a shirt on any other way than by rubbing my underarms all over the place.

Today, after I had gotten fully dressed, I decided to change my shirt at the last minute. I did the switcheroo and almost immediately, I regretted it. Those darn deodorant marks were lurking along the side of my shirt and I really did not want to switch back. I remembered something about rubbing a dryer sheet on the marks would get them off. They were pretty light marks (my deodorant is clear, but you know how that works…it is clear until it hits something like cloth, and then it turns white-ish), but I grabbed a dryer sheet from the box and lightly rubbed it on there. It kind of left a bit of a white mark on top of the light mark that was already there. I think it muted the deodorant though, but now I had a smudge on my shirt. I rubbed at it with my hand for a few seconds, and it all went away.

Upon further reading after this mostly unsuccessful project, it turns out that I should have used a USED dryer sheet. That probably would have eliminated that annoying white smudge thing. Maybe I need to give this a try again the right way the next time I forget how to put a shirt on.

Total cost: $0

Day 269 – Banana to Fix a CD

Love is a many splendored thing. Love lifts us up where we belong. All you need is love.

Screen shot 2013-05-15 at 9.16.57 PM

Except when your beloved Moulin Rouge CD is scratched and is all skippy. Then all you need is a banana.

That’s right. A banana.

Just rub a banana in a circular motion around your broken Moulin Rouge (or any, I suppose) CD, and then wipe it off with a lint-free cloth. You can wipe away any smudges with Windex.

Then you can get back to skip free listening.

At this point, it seems to be working perfectly! Hooray for bananas being GOOD instead of GROSS!!

Total cost: $? Somewhere around $0.55 a pound. At Target they cost 24 cents each.


Day 268 – Zucchini Chips

A friend from work had suggested I make some zucchini chips one day, so when I was at the store yesterday, I bought a zucchini.

Many times, I adjust recipes to suit my needs, only to find that the person who created the recipe really knew what they were talking about and I should have just listened. To avoid frustration, I followed the recipe exactly.

1 zucchini, sliced in large rounds at an angle
1/4 cup milk
1/4 cup panko bread crumbs
2 tablespoons plain bread crumbs
2 generous tablespoons grated cheese
1/4 teaspoon salt + pepper
sprinkling of cayenne powder or crushed red pepper flakes (optional)
Preheat the oven to 425 degrees. Pour the milk in one small bowl and both bread crumbs, cheese, cayenne and salt and pepper in another bowl. Dip the zucchini rounds in the milk, then the crumbs mixture, pressing down to adhere the crumbs to the zucchini. Place on a wire rack coated with cooking spray on top of a cookie sheet, and bake for 30 minutes.
 
I put them in for 30 minutes, and then got busy doing laundry and other assorted household tasks. When the timer went off, I was quite disappointed to see that many of them had burned. I think that I cut them too thinly. I thought I should cut them pretty thin because they were supposed to be “chips” so I wanted them to feel chippy. Some of the thicker ones turned out quite well and they are very tasty. I have about 1/2 a zucchini left that I did not bake, so maybe I will try it again tomorrow. I will just lower the time and keep my eye on it more often while it is cooking…you live and learn…
image

 
Total cost: $1.01

Day 266 – Picture Hanging Technique

Hanging a cluster of pictures can be quite tricky. Do you have them arranged in the correct design? Are they equidistant from each other? Are there too many gaps? When executed correctly, it can be wonderful, but if one or more of the components is out of whack, you have a mess. You want people to see them and think they look cohesive and adorable…you don’t want them to think about how you should have put that 5 x 7 a few inches higher and that there is too much space between the two on the left.

Today, my husband put together a lovely montage of photos for his mom to hang on a blank wall in her house. To assist, I traced each frame onto paper, and marked where the hanger was. Then we taped the pictures to the wall and arranged them how we wanted them. I measured and adjusted and then he did the manual labor of nailing. We ripped the paper off, and hung the pictures.

It was almost a flawless plan and in theory it should work perfectly…if you can measure. Apparently I measured one spot to be 2 inches when it should have been 3. That threw off one of the other pictures, so we needed a few extra holes in the wall. Thankfully, the holes are covered by the frames.

In the end, I think it worked out well. Definitely useful when hanging more than one picture in a group on the wall.
image

Total cost: $0 for the hanging part